
Stella Sora Build Guide: Teams, Potentials, and Tips
Find your Stella Sora build with team lineups, key potentials, and combat tips for Eleanor, Chitose, Shia, Fuyuka, and Gerie. Choose your next upgrades.
Jump to

Eleanor Build: Wraith Main With Backline Damage
Your Stella Sora build can put serious damage in the support slots, so choosing a main is only the beginning. Matching potentials, damage types, and skill timing matters because a mismatched setup can waste the buffs your team provides. This Stella Sora build guide covers five team setups, with practical choices for boss damage, wave clearing, and automatic combat.
Eleanor’s normal-attack support setup pairs her with Wraith as main and Ann as the other support. Both Wraith and Eleanor contribute normal-attack damage, while Ann supplies team buffs. Eleanor also has an explosive skill-damage route with strong area coverage; choose the normal-attack route when concentrating damage on a single target.
| Trekker | Position | Potential priorities |
|---|---|---|
| Wraith | Main | Dauntless Poise and Tempest Stance |
| Eleanor | Support | Function Sustain, Cluster Barrage, then Annihilation Echo |
| Eleanor | Support follow-up picks | Piercing Trajectory, Suppression Analysis, Power Amp, Wind Resonance |
| Ann | Support | Warm Wind Wall, Wind Banish, Forest Princess’s Blessing, Turbulent Flow, Wind Erosion Havoc |
Let Eleanor’s sentries finish their work
Eleanor’s support skill creates sentries as she jumps. Her normal-attack build increases sentry attack speed as their numbers grow, loading much of her damage into the latter half of the skill cycle.
Avoid casting her ultimate early in that cycle. Wait until her skill cooldown is nearly finished; casting sooner can cost jumps and sentries.
Ann’s skill has a 16-second cooldown compared with Eleanor’s 12 seconds. Use both skills as they become available during extended fights. Before a short break window, hold Ann briefly if that aligns her buffs with Eleanor’s concentrated damage.
For Eleanor’s support emblems, prioritize the first penetration line, then normal-attack damage over critical rate. Support Skill +3 is especially valuable on the level-80 emblem. On the level-90 emblem, Annihilation Echo +3 and Piercing Trajectory are strong options.
Adjust the team when Wraith is missing
Use Suntide Willow, Nazuna, or Tilia in the main slot, with Eleanor and either Nazuka or Ann behind them. With Nazuka, activate both support skills together to align her Erosion stacks with Eleanor’s damage window.
In this configuration, replace Eleanor’s Wind Resonance with Purge Command. Skip Ann’s Windgate Barrier when the main slot is occupied by a support whose damage you are not building around.
Check disc conditions carefully: an off-element main changes which effects activate. Suntide Willow as main also makes Ascension supply Aqua notes rather than Ventus notes.
Official page: Stella Sora (stellasora.global)
Chitose Build: Choose Skill Damage or Normal Attacks
The standard Chitose team places Chitose as main, with Freesia and Teresa supporting. It offers two distinct potential routes: skill damage for competitive modes and normal attacks for manual raid play.
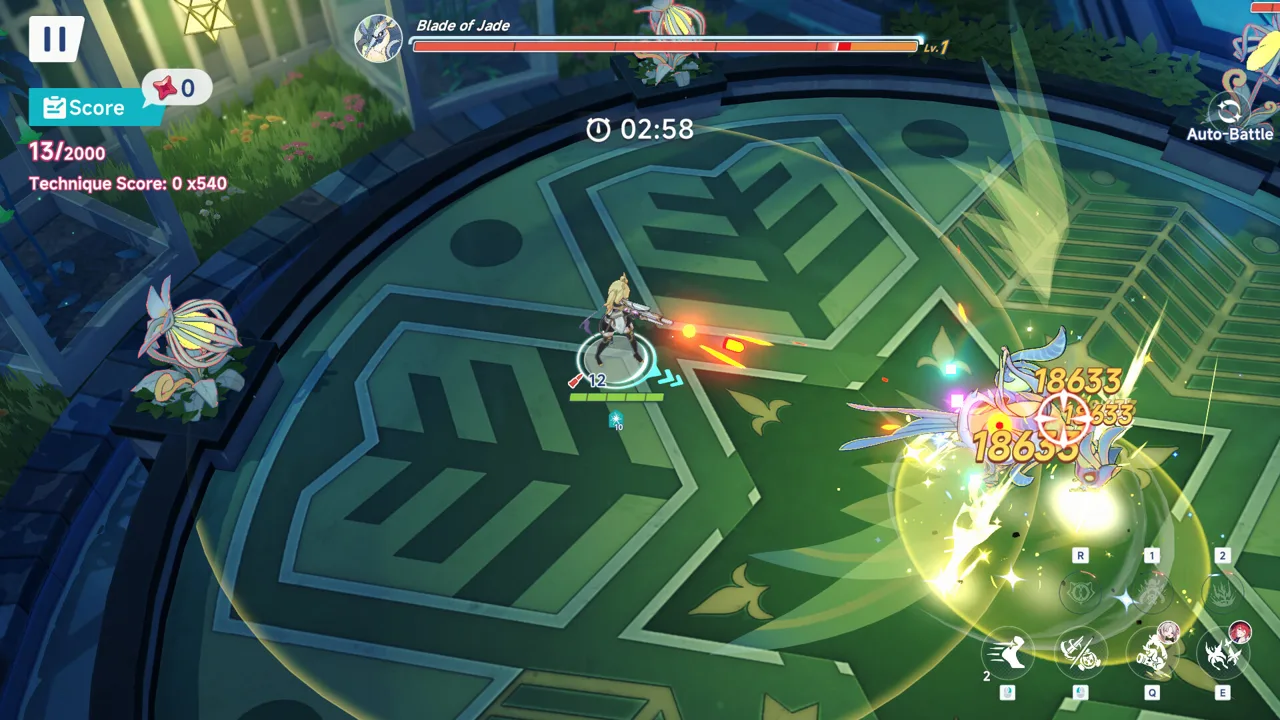 Image: Steam / YOSTAR HONG KONG LIMITED
Keep your Stella Sora build focused on the route you intend to play. Chitose’s skill and normal-attack setups use different core picks, so select the matching potentials before adding secondary damage bonuses.
| Build component | Potential or upgrade priorities | Purpose |
|---|---|---|
| Chitose skill route | Against the Flow, Cascade of Ruin, Flowing Circle | Skill-focused competitive setup |
| Chitose normal-attack route | Serpent’s Glide, Mirror Blade, then Aqueous Phantasm | Manual raid damage |
| Normal-attack follow-up picks | Tremble and Fall, Dance of Elegance; retain Azure Embrace | Complete the normal-attack setup |
| Freesia support | Manage her conditional burst window | Concentrated support damage |
| Teresa support | Water support setup | Shielding and team support |
Commit to the damage route
For the skill route, take Against the Flow and Cascade of Ruin, then favor Flowing Circle over Returning Tide and Serpent in Tide.
For normal attacks, start with Serpent’s Glide and Mirror Blade. Add Aqueous Phantasm, then Tremble and Fall and Dance of Elegance, while keeping Azure Embrace.
Prioritize the main carry’s rainbow potential, followed by damage-focused rainbow potentials and gold damage picks. Skip early critical potentials in this setup: the cited starting critical rate is just 5%, making those picks less attractive before the supporting investment is there.
Chitose also has a specialization-1 dodge-loop setup built around reaching her final strike through her shadow-hide stance. Practice the dodge-to-strike sequence when choosing that route.
Upgrade the support slots deliberately
Donna can replace Freesia in a Chitose–Donna–Teresa lineup, bringing Messenger Arrow and Water Ripple. Her decoy doll adds defensive utility.
Suntide Willow appears in both Chitose–Donna–Suntide Willow and Chitose–Suntide Willow–Teresa teams. Her mark and direct-damage routes offer separate investment paths.
Keep Freesia’s timing in mind when retaining her. Her burst is conditional, so maintaining its damage window is part of playing the team effectively. For automatic arena combat, Chitose–Freesia–Teresa is an established configuration built around Chitose’s attack uptime, Freesia’s burst, and Teresa’s shielding.
Shia Build: Separate Boss Damage From Area Damage
Shia’s standard Lux lineup is Shia main with Tilia and Minova supporting. Her summoned drones drive her damage, and her boss and area-damage setups use different potential packages.

This Stella Sora build rewards execution. Shia’s September 2026 dash-cancel setup depends on canceling her attack animation with a dash to sustain damage. Practice that sequence before judging the setup by its peak-damage reputation.
| Component | Boss-focused picks | Area-damage picks or alternatives |
|---|---|---|
| Shia core package | Phantom Step Radiance, Rimecrystal Edge, Subzero Dominion, Leporine Gale | Moonlight Overflow, Astral Pirouette, Lunar Detonation |
| Shia follow-up package | Rimeheart Pulse, Glacial Dash, Hare’s Pursuit | Final Crescent, Lunar Combo |
| Tilia support | Holy Inscription, Renewed Spectrum, Brilliant Relay, Enemy Counter | Add Blinding Beam and Trick Boost |
| Minova support | Four-Star Wanted Level, Radiant Burst, Radiant Synergy | Perfect Arc and Fervent Applause |
| Support alternatives | Firefly in Minova’s slot for boss-focused play | Jinglin as a low-investment Minova substitute |
Build around the encounter
Use the snow-rabbit potential package for bosses in this Stella Sora build. Switch to the night-rabbit package when area damage is the priority.
Raise Shia’s main skill before her normal attack and ultimate. For emblems, prioritize light penetration. On Tilia and Minova, invest in assist skills to strengthen their support contributions; their ultimates are optional priorities in this configuration.
When using Jinglin instead of Minova, keep investment modest. Her available picks include Thunderbolt: Circle, Thunderbolt: Dragon, Social Butterfly, Self-drawn Concealed Hand, No Ones No Nines, and Triple Chows.
Match Firefly to boss fights
Firefly offers a specialization-2 support alternative alongside Shia and Tilia. Prioritize her cage-dance and playmate picks, followed by friend circle and the charging picks.
Use that variation for boss-focused encounters that do not require Minova’s coverage. Keep the standard Shia–Tilia–Minova lineup available for its established combination of carry damage and support buffs.
The important execution task remains Shia’s dash cancel. Work on maintaining the attack-and-dash rhythm while handling enemy attacks, since the damage ceiling of this variant depends on that technique.
Fuyuka Build: Reload, Attack Speed, or Critical Boss Damage
Fuyuka’s established fire teams retain Flora as support, then use Chixia or Snowish Laru in the remaining slot. Choose between reload and attack-speed potentials, or build around the September 2026 critical boss setup with Snowish Laru.

For this Stella Sora build, preserve Flora’s role when changing the second support. Her critical buffs remain part of both configurations.
| Component | Potential priorities | Upgrade focus |
|---|---|---|
| Fuyuka reload route | Reload, Double Strike, Thunder Punch | Normal attack and main skill before ultimate |
| Reload follow-up picks | All-Out Effort, Peak Performance, Ironfist Blow or Pyro Mark | Use Finishing Blow against bosses |
| Fuyuka attack-speed route | Kitty Punch, Multi-Shot, Blast Chase, Combo Punch, Peak Performance | Maintain the attack-speed package |
| Flora support | Ashes of the Past, Spark of Ashes, Reinforced Impression | Assist skill |
| Chixia support | Crimson Dragon pair and Ink Sigil line, especially Horn Call | Support contribution |
| Snowish Laru support | Entry potential and toy-soldier line | Level and assist skill |
Finish one Fuyuka package
For reload play, establish Reload and Double Strike before expanding into the follow-up damage picks. Against bosses, take Finishing Blow in place of Thunder Punch.
For attack-speed play, build around Kitty Punch, Multi-Shot, and Blast Chase, then add Combo Punch and Peak Performance.
On Flora, start with Ashes of the Past and Spark of Ashes, followed by Reinforced Impression. Guest Performer, Visual Impact, and Foreshadowing Verification complete her additional support picks.
Respect the critical build’s defense gap
Fuyuka–Snowish Laru–Flora concentrates on critical damage around Fuyuka’s claw-sharpen mark. Snowish Laru’s entry potential and toy-soldier line maintain the offensive buffs.
This boss configuration sacrifices survivability. Prioritize dodging rather than trading hits while trying to maintain damage.
If Snowish Laru is unavailable, use Chixia with her Crimson Dragon and Ink Sigil support picks. Keep Flora in the lineup.
Gerie Build: Skill Damage or Automatic Normal Attacks
Gerie’s established Terra team is Gerie main, Nazuna support, and Ridge support. Nazuna contributes essential offensive support, while Ridge supplies defense reduction and utility.
Choose the skill route for a skill-focused Stella Sora build, or use the normal-attack variant for an established automatic-combat setup. Both retain the same three Trekkers.
| Trekker or route | Potential priorities | Upgrade or stat focus |
|---|---|---|
| Gerie skill route | Endless Throes, Agony Cascade, Piercing Sorrow, Shared Sensation | Normal attack and main skill |
| Skill follow-up picks | Everyone’s Invited, Shadow Law, Slanderous Strike | Complete the skill package |
| Gerie normal-attack route | Beyond All Control, Avalanche of Stone, Lingering Hunger, No Safeword | Automatic normal-attack play |
| Nazuna support | Bold Assertion, Feel the Beat, Lucky Drop, Jubilant Spin, Double Delight, Operation: Pandemonium | Assist skill and ultimate |
| Ridge support | Reblossom, Hasty Growth, Small Changes, Corrosive Vines, Root Grasp | Defense reduction and utility |
Secure the team’s key potentials
Prioritize Lucky Drop, Shared Sensation, the first copy of Piercing Sorrow, and the first copy of Jubilant Spin across the team.
For Gerie’s skill setup, critical damage becomes valuable with Nazuna’s Operation: Pandemonium at level 6. Together with the innate 5% critical rate, that setup brings Gerie’s skill critical rate to 41%. Apply that emblem priority to this specific setup rather than every damage dealer.
Ridge’s Small Changes is particularly important for her seed-ball range utility. Retain her support contribution while developing Gerie and Nazuna.
Nazuna can also take the main slot, with Gerie moved to support. Explore that variant once you have duplicate investment in Nazuna; Gerie remains the standard main for the lineup above.
FAQ
Which Stella Sora build works for automatic combat?
Gerie–Nazuna–Ridge has an established automatic normal-attack variant. Chitose–Freesia–Teresa also offers an automatic arena setup built around attack uptime, conditional burst, and shielding.
What is a budget Ventus team?
Use Noya as main with Ann and Canace supporting. Her blade-flow team provides strong area damage but weaker single-target output. Nanoha and Wraith offer upgrade paths for the main slot.
Can Eleanor be the main damage dealer?
Yes. Her normal-attack main setup uses Tactical Protocol Threshold and Detonation as cores. Add Double Rifts, Battle Fury, Vortex Boost, and Focus Command, and avoid interrupting Cross Slashes when she reaches six Tactical Energy.
Can I import a complete team build?
System Presets include team members, potential selections, levels, and an import code. Paste the code into the game’s potential import box, then check that the lineup and main/support positions match the setup you intend to use.
Continue with
 Stella Sora Charge Efficiency: Build Better UltimatesMaster Stella Sora charge efficiency with Main and Support rates, Ultimate energy costs, and Fuyuka build tips. Plan better rotations and smarter Emblems.
More in Builds

Stella Sora Derivative Damage: Stats and Build Guide
Build smarter with this Stella Sora derivative damage guide. Compare damage categories, DEF reduction, PEN, crit scaling, and resilience break bonuses.

Stella Sora Disc Guide: Skills, Notes, and Aqua Builds
Build a stronger team with this Stella Sora disc guide covering main and support slots, Melody and Harmony skills, music notes, selectors, and Aqua setups.

Stella Sora Emblem Guide: Stat Priorities and Builds
Build a stronger Stella Sora emblem setup with stat priorities, level 70–90 unlocks, Terra team examples, and reroll tips to save rare Emblem Polishers.
Stella Sora Preset Guide: Import Codes and Team Builds
Find the right Stella Sora preset with import codes for Noya and Allie, build priorities, team comparisons, and practical tips for matching your roster.
Join the community
Official channels for news, updates and player help: