
Stella Sora Charge Efficiency: Build Better Ultimates
Master Stella Sora charge efficiency with Main and Support rates, Ultimate energy costs, and Fuyuka build tips. Plan better rotations and smarter Emblems.
Jump to
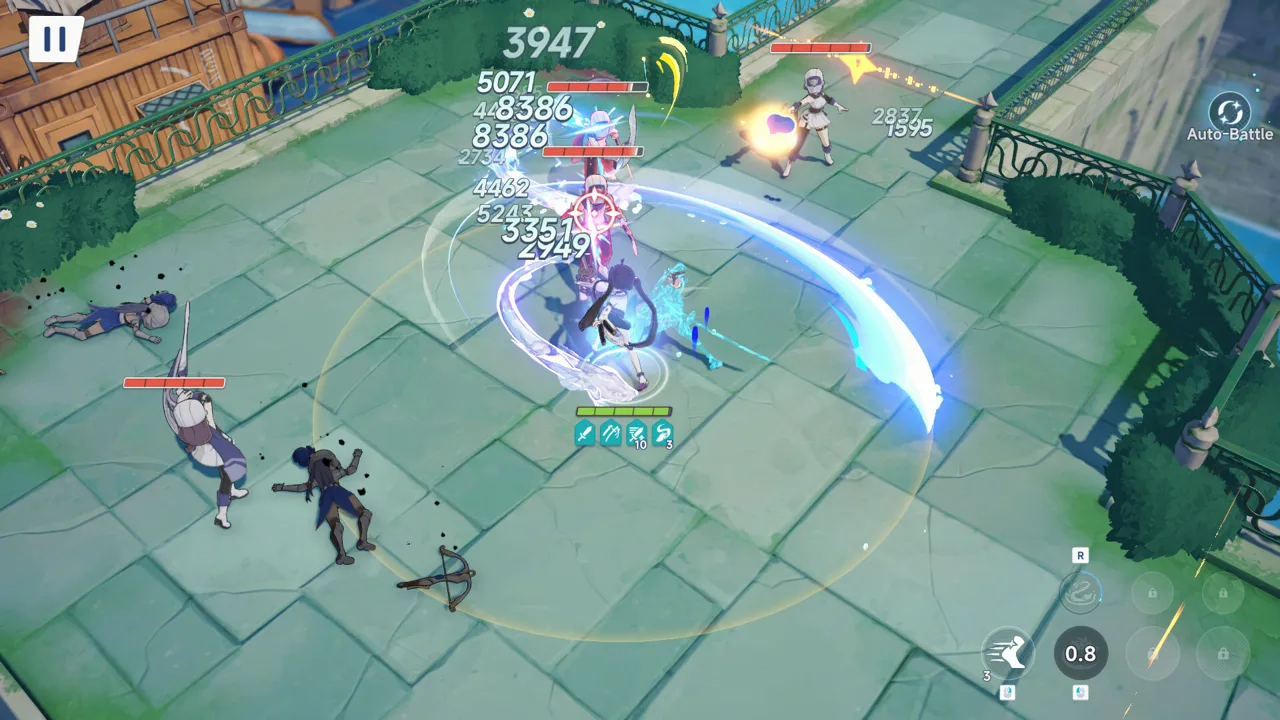
How Stella Sora Charge Efficiency Works
An Ultimate that fills too late can miss the opening your whole team was built around. Stella Sora charge efficiency affects how efficiently Trekkers gain the energy needed for their Ultimates, with Main and Support positions using different baseline rates. Understanding Stella Sora charge efficiency helps you plan burst windows, compare builds, and decide whether an energy-focused Emblem deserves a slot.
The central mechanic is straightforward: landing attacks with your Main Trekker charges SP, the resource used to activate Ultimates. Each character has an Ultimate energy requirement, and the Ultimate button lights up when the skill becomes available.
Your squad position affects energy gain:
| Position | Charge efficiency | Effect on energy gain |
|---|---|---|
| Main | 100% | Receives the full baseline charging rate |
| Support | 75% | Receives three-quarters of the baseline charging rate |
That difference matters when your rotation depends on a Support Ultimate. Putting a character in Support changes the energy timeline you need to plan around.
Build around the Ultimate you need during the fight. If a Support’s burst or team buff is central to your strategy, watch its readiness alongside your Main Trekker’s gauge. Avoid assuming both characters will become ready together.
Keep the distinction between position and combat role clear, too. Sparkla is a Vanguard, for example, but has both Main and Support charge-efficiency values. The charging percentage describes her squad position.
Official page: Stella Sora (stellasora.global)
Check Energy Cost and Cooldown Before Changing Your Build
Charge efficiency is one part of Ultimate availability. The amount of energy required also matters, and that requirement differs between characters.

Open a Trekker’s Ultimate information and inspect its Energy Cost. The Version 1.9 update added the ability to select Energy Cost for details on Ultimate energy efficiency, making this a useful starting point before adjusting equipment.
These character examples show why a single charging recommendation cannot cover every build:
| Trekker | Ultimate | Energy requirement | Additional timing detail |
|---|---|---|---|
| Sparkla | All-Out Bunny Barrage | 357 | Listed cooldown of 40 seconds |
| Fuyuka | Blaze Unsealed | 345 | Long animation affects burst timing |
Sparkla’s information separates energy from cooldown. Read both values when planning repeat casts. A charge-efficiency investment addresses energy gain; keep the listed cooldown in view when assessing the complete rotation.
Fuyuka presents a different issue. Her Ultimate demands substantial energy, but its lengthy animation also affects how much damage fits inside a favorable opening. Getting the button ready solves only the charging portion of that problem.
When evaluating Stella Sora charge efficiency, follow this sequence:
- Check the Ultimate’s energy requirement.
- Confirm whether the Trekker occupies Main or Support.
- Inspect any listed cooldown.
- Identify the moment you want to cast.
- Compare that plan with the character’s actual readiness during combat.
Choose a practical casting goal before chasing more energy gain. Preparing an Ultimate for an enemy’s Break window gives your build a clearer objective than simply trying to fill the gauge faster.
Keep Attacks Connecting and Plan Your Burst Window
Because Main Trekker attacks charge SP when they hit enemies, attack uptime deserves attention before you spend resources on equipment changes.

Stay within a range where your attacks connect. Reposition around dangerous attacks, then resume attacking when the opening returns. An interrupted rotation needs a combat adjustment before it needs an expensive Emblem overhaul.
Manual control also gives you more room to manage difficult encounters. Dodging provides a brief invulnerability window, while boss attack warnings help you recognize incoming danger. Use those tools to protect your rotation and keep your Main Trekker active.
That does not mean forcing every animation through an incoming attack. Fuyuka’s Main Skill illustrates the tradeoff: dodging can cancel its animation, but canceling too early prevents her from receiving ammo. Canceling partway through can also sacrifice its second hit.
Learn where your important skill effects occur. Preserve ammo generation and valuable hits whenever the encounter gives you enough room to finish the action.
Once an Ultimate becomes ready, consider the target’s condition. Enemy Break windows offer opportunities for heavy damage, but the length of your Ultimate matters.
For a short burst, preparing it for Break is a straightforward damage plan. For a long animation, examine how much of the attack will fit before the window ends. Starting late can leave part of the Ultimate outside the opening you intended to exploit.
Use these checks during a fight:
- Watch for the Ultimate button becoming available.
- Keep Main Trekker attacks landing between mechanics.
- Prepare relevant Support effects before committing to burst.
- Check whether the enemy is entering Break.
- Account for the Ultimate’s animation before pressing it.
Stella Sora charge efficiency becomes useful when it supports this timing. A ready Ultimate still needs a worthwhile opportunity to cast.
Fuyuka Builds: Decide How Much the Ultimate Matters
Fuyuka demonstrates why energy investment should follow your chosen damage plan. Her kit supports Auto Attack, Skill, and Ultimate-focused approaches, each with different priorities.
 Image: Steam / YOSTAR HONG KONG LIMITED
Her Main Skill, Ignis Infusion, supplies ammo for enhanced Auto Attacks. That interaction gives her regular combat loop a purpose even between Ultimates.
| Build | Central interaction | Damage focus | Ultimate investment |
|---|---|---|---|
| Kitty Punch | Main Skill applies Paw Print; Auto Attacks activate additional damage | Single-target damage through repeated activations | Keep the Skill and Auto Attack loop developed |
| Reload | Main Skill increases magazine capacity for more Fiery Punches | Sustained Auto Attack damage and AoE coverage | Develop the enhanced-attack loop |
| Ultimate Burst | Ultimate Potentials strengthen Blaze Unsealed | Concentrated Ultimate damage | Pair charging investment with Ultimate damage bonuses |
Kitty Punch and Reload Priorities
For Kitty Punch, apply Paw Print through the Main Skill, then keep Auto Attacks connecting to trigger its additional damage. The build’s repeated-hit structure gives you a reason to maintain pressure between major casts.
Reload expands the ammo-based playstyle, supporting repeated Fiery Punches and broader AoE damage. Its build-defining choices reinforce enhanced Auto Attacks rather than making every decision revolve around Blaze Unsealed.
Protect those core interactions when comparing Emblems. For Kitty Punch, inspect Skill DMG and relevant Potential bonuses. For Reload, examine Auto Attack DMG and bonuses that strengthen its enhanced attacks.
The practical question is whether extra Stella Sora charge efficiency improves your chosen rotation enough to justify the damage stats you give up. Keep the full fight in view when making that comparison.
For regular Main-role development, Fuyuka’s upgrade priority is Main Skill, then Auto Attack, then Ultimate. Main Skill levels also improve the scaling of her Core Potentials, connecting that investment directly to her build.
Building Around Blaze Unsealed
An Ultimate-focused Fuyuka setup calls for a more deliberate commitment. Charge Efficiency helps address energy generation, while Ultimate DMG strengthens the attack you are preparing.
Her Ultimate build uses Kitty Punch components to support damage between casts, then adds dedicated Ultimate Potentials:
- Ironfist Blow adds punches and increases Ultimate DMG.
- Peak Performance increases Ultimate DMG with a bonus that decays over time.
- Blazing Heart raises Base ATK during the Ultimate when it triggers Ignis Mark.
Prioritize level 6 for Ironfist Blow and Peak Performance when committing to this setup.
Version 1.9 changed an important detail: Peak Performance’s timer pauses while the Blaze Unsealed animation plays and resumes afterward. Apply that behavior when planning the build’s buff timing.
Fuyuka’s long Ultimate also grants immunity to damage and crowd control during its use. Consider casting through a dangerous boss mechanic when that lets you continue dealing damage safely. Balance that defensive opportunity against the timing of your next burst opening.
Tune Emblems Around Your Damage Plan
Emblems give you another way to specialize a Trekker, including building toward Charge Efficiency and Ultimate DMG. Start with a clear purpose for the loadout before reforging.
For Fuyuka, that purpose might be improving Kitty Punch activations, strengthening Reload’s enhanced attacks, or preparing a dedicated Ultimate setup.
| Build direction | Relevant stats or bonuses | How they connect to the build |
|---|---|---|
| Kitty Punch | Skill DMG, Main Skill levels, Blast Pursuit levels | Strengthen Skill-based damage and key Potential interactions |
| Reload | Auto Attack DMG, Thunder Punch levels | Reinforce Fiery Punches and enhanced-attack damage |
| Ultimate-focused Fuyuka | Charge Efficiency, Ultimate DMG | Support energy generation and Ultimate damage |
| General Fuyuka offense | Ignis DMG, ATK%, Crit Rate | Support her broader offensive kit |
Choose effects that match the damage your build actually deals. A strong Ultimate modifier has a different purpose from a Skill DMG bonus, even when both appear attractive on the equipment screen.
Emblem stat options also differ by slot. Fuyuka’s level 80 Emblem options include additional Main Skill levels, while level 90 options include direct bonuses to specific Potentials. Inspect those options alongside ordinary damage stats when comparing pieces.
Use the Emblem system’s stat locks to preserve valuable affixes during reforging. Star Emblem Polishers are used for locking stats, so identify the affixes you want to keep before spending them.
Version 1.9 also introduced Emblem Tempering, which uses Drop of Purity to enhance Emblem affix effects. Reserve that investment for effects that support the loadout you intend to use.
For a practical Stella Sora charge efficiency check, compare your build in the same encounter while keeping your team and combat plan consistent. Watch when the Ultimate becomes ready, whether it reaches your intended opening, and how your regular attacks perform between casts.
Evaluate the complete result. An energy-focused setup needs to support the fight’s damage plan, including the time spent outside your Ultimate.
FAQ
What does Stella Sora charge efficiency do?
It affects how efficiently a Trekker gains energy toward an Ultimate. Main position has a baseline rate of 100%, while Support has 75%. Main Trekker attacks charge SP when they hit enemies.
Why does my Support Ultimate become ready later?
Support position has a lower baseline charge-efficiency rate than Main. Characters also have different Ultimate energy requirements. Check both the position rate and Energy Cost when planning your squad’s casting order.
Should I prioritize Charge Efficiency on Fuyuka?
Prioritize it when committing to an Ultimate-focused setup alongside Ultimate DMG and dedicated Potentials. For Kitty Punch or Reload, develop the Skill and Auto Attack interactions central to those builds before redirecting equipment investment toward Ultimates.
Should I always save an Ultimate for Break?
Plan around the Ultimate’s animation and the encounter’s mechanics. Break offers a favorable damage opening, but Fuyuka’s lengthy Blaze Unsealed requires careful timing. Its immunity to damage and crowd control also gives it a defensive use during dangerous attacks.
Continue with
 Stella Sora Derivative Damage: Stats and Build GuideBuild smarter with this Stella Sora derivative damage guide. Compare damage categories, DEF reduction, PEN, crit scaling, and resilience break bonuses.
More in Builds

Stella Sora Build Guide: Teams, Potentials, and Tips
Find your Stella Sora build with team lineups, key potentials, and combat tips for Eleanor, Chitose, Shia, Fuyuka, and Gerie. Choose your next upgrades.

Stella Sora Disc Guide: Skills, Notes, and Aqua Builds
Build a stronger team with this Stella Sora disc guide covering main and support slots, Melody and Harmony skills, music notes, selectors, and Aqua setups.

Stella Sora Emblem Guide: Stat Priorities and Builds
Build a stronger Stella Sora emblem setup with stat priorities, level 70–90 unlocks, Terra team examples, and reroll tips to save rare Emblem Polishers.
Stella Sora Preset Guide: Import Codes and Team Builds
Find the right Stella Sora preset with import codes for Noya and Allie, build priorities, team comparisons, and practical tips for matching your roster.
Join the community
Official channels for news, updates and player help: