
Stella Sora Chitose Guide: Builds, Teams, and Emblems
Build Stella Sora Chitose around auto attacks with the right potentials, Teresa support, and Aqua PEN emblems. Learn her combos and upgrade priorities now.
Jump to
What Is the Best Stella Sora Chitose Build?
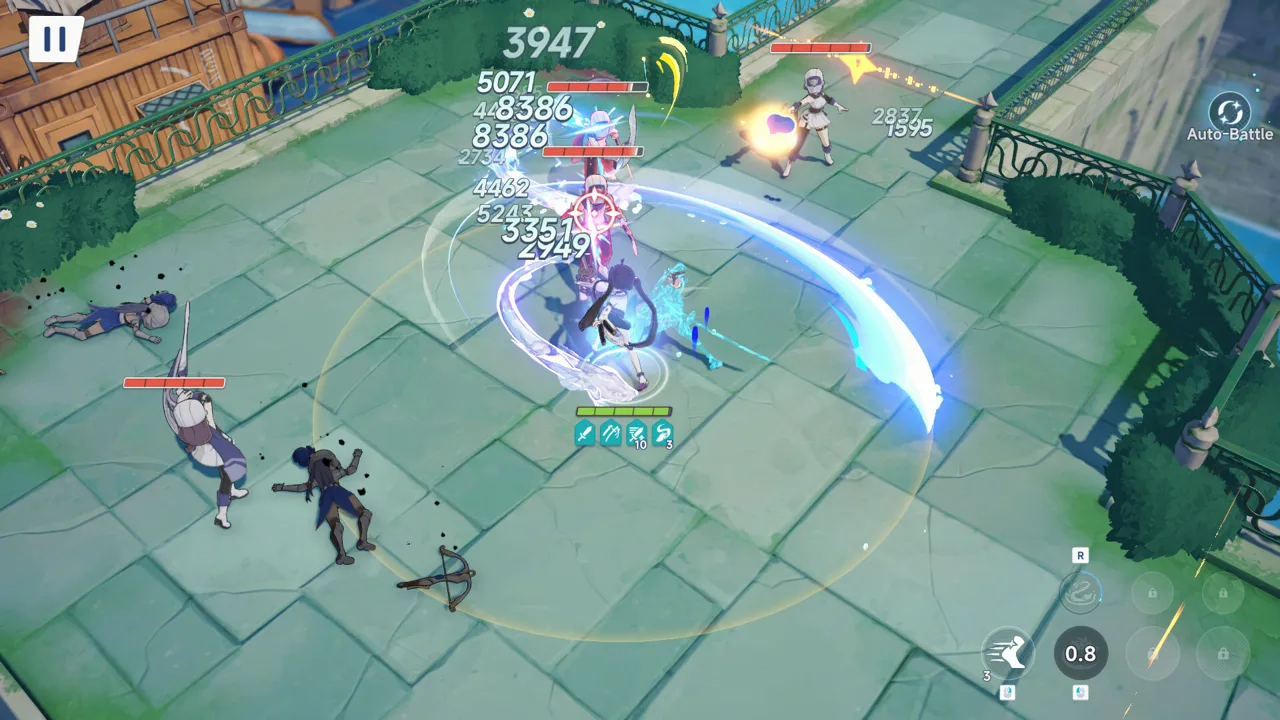
Stella Sora Chitose turns dodge cancels and heavy basic attacks into a powerful Aqua damage loop. Her support choices matter because their auto attack buffs push that loop well ahead of her skill-focused alternative. Build Stella Sora Chitose around Serpent’s Glide, Mirror Blade, and Tremble and Fall, then pair her with Teresa and either Iris or Freesia.
Chitose has two main damage approaches: auto attacks and repeated skill use. Their individual output is comparable in isolation, but Aqua supports offer substantial auto attack bonuses. That support advantage makes the basic attack build the stronger option for the team setup covered here.
The damage estimates below use theoretical averages across 180 seconds. Fight length, disc effects, and note and harmony skill outcomes affect how those estimates translate into a particular run.
The build comes together through three connected decisions:
- Take the core potentials that enable her attack loop.
- Prioritize the support buffs that multiply its damage.
- Use animation cancels while keeping enemies inside your support skills.
Chitose’s ultimate takes long enough to reduce single-target DPS under ordinary conditions. Keep your attention on her basic attack sequence instead of assuming every available ultimate belongs in the rotation.
Official page: Stella Sora (stellasora.global)
Chitose Potential Priorities
For a Stella Sora Chitose auto attack build, establish the complete attack loop before chasing smaller bonuses. Both core potentials belong in the setup, while Tremble and Fall supplies the common potential needed for the stronger dodge-based combo.
 Image: Steam / YOSTAR HONG KONG LIMITED
| Potential | Priority | Build contribution |
|---|---|---|
| Serpent’s Glide | Core | Take alongside Mirror Blade |
| Mirror Blade | Core | Completes the recommended core pairing |
| Tremble and Fall | Mandatory pickup | Enables the dodge-based auto attack combo, estimated around 45% stronger |
| Aqueous Phantasm | Highest subsequent priority | Delivers substantial total damage gains as its level increases |
| Dance of Elegance | Next leveling priority | Valuable auto attack scaling |
| Azure Embrace | Equal priority to Dance of Elegance | Another strong leveling choice |
| Waltz of Ripples | Lower leveling priority | Useful after the stronger options |
| Flowing Circle | Low priority | Offers roughly 1% total damage in the evaluated setup |
Separate picking a potential from leveling it
Tremble and Fall is essential to acquire, but additional levels rank below Aqueous Phantasm, Dance of Elegance, and Azure Embrace. Its importance comes from enabling the combo; that does not make every subsequent upgrade equally valuable.
Take Tremble and Fall, then direct your next meaningful upgrades toward Aqueous Phantasm. Follow with Dance of Elegance and Azure Embrace. Return to additional Tremble and Fall levels and Waltz of Ripples after those higher-value options.
This distinction helps when several familiar names appear together. Ask whether you are completing the build’s basic function or improving an already functional setup. Those are different decisions.
Keep small bonuses in perspective
Flowing Circle’s roughly 1% total damage contribution illustrates the gap between a minor pickup and a defining potential. Prioritize the options that improve Chitose’s main damage engine before filling out the rest.
Also consider the whole team when choosing upgrades. Teresa’s strongest auto attack buff carries more value than another marginal improvement on Chitose herself.
Team Building: Teresa, Iris, and Freesia
The recommended Stella Sora Chitose team uses Chitose, Teresa, and either Iris or Freesia. Teresa supplies the largest support payoff, while the final slot changes the balance between consistency and higher damage potential.
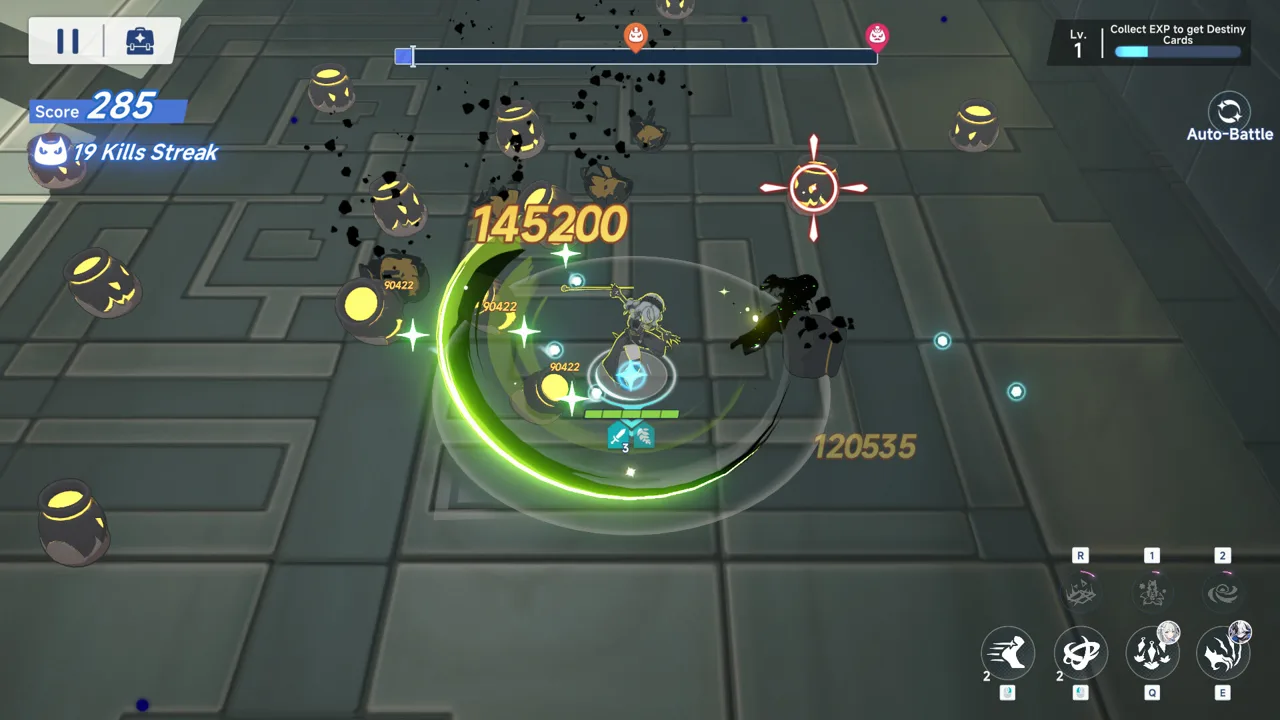 Image: Steam / YOSTAR HONG KONG LIMITED
Teresa: prioritize Let Me Help
Teresa’s rare potential, Let Me Help, provides up to a 255% auto attack damage boost. Within the evaluated team setup, that contribution nearly doubles Chitose’s overall output. It is the highest-value potential to level across this team.
| Teresa potential | Priority | Purpose |
|---|---|---|
| Let Me Help | Highest leveling priority | Provides up to 255% auto attack damage |
| Surge: Infinite | Core | Helps extend the support buffs associated with her setup |
| Immortality | Core | Helps maintain buffs from Tidal Domain and Surging Shield |
| Isn’t It Awesome | High | Valuable damage support |
| Shortcut Seeker | High | Valuable damage support |
| Band-Aid Collector | Lower | Secondary consideration after stronger buffs |
| Wave Breaker | Lower | Powerful debuff limited by poor uptime |
After Let Me Help, prioritize Isn’t It Awesome and Shortcut Seeker. Their upgrades have slightly more value than Chitose’s potentials outside her core build.
Wave Breaker needs particular attention to uptime. Its debuff is powerful, but its limited availability reduces its average contribution. Do not judge it entirely by the damage possible while the effect is active.
Iris: consistent support and single-target debuffs
Iris uses Blizzard: Spread and Vortex as her cores. Her most important single-target potential is Bundle Sale, which increases the damage an enemy takes.
That debuff matters because Teresa’s Wave Breaker provides limited coverage. Forced Liquidation follows with a substantial attack buff, while one point in Prolonged Winter significantly improves the uptime of Iris’s skill and its associated buffs.
Freesia: higher output with more variation
Freesia can produce much higher damage than Iris, but her performance depends heavily on Temporal Revival activating.
At two stacks, Temporal Revival grants 240% auto attack damage. Each skill cast has a 50% activation chance. A +3 potential emblem increases that chance to 70%, requiring investment to level 90.
| Support | Potential or core | Priority or function |
|---|---|---|
| Iris | Blizzard: Spread and Vortex | Recommended core pairing |
| Iris | Bundle Sale | Highest single-target priority; damage-taken debuff |
| Iris | Forced Liquidation | Next priority; large attack buff |
| Iris | Prolonged Winter | Take one point for improved skill and buff uptime |
| Iris | Sneaky Fisher | Lower priority |
| Freesia | Realm of Frost and Localized Snowfall | Recommended core pairing |
| Freesia | Temporal Revival | Major auto attack buff with chance-based activation |
| Freesia | Winter’s Grip | High-value damage-taken debuff |
| Freesia | Guardian’s Heart | Crit rate support with comparatively lower value |
Choose Iris for more consistent performance. Choose Freesia for higher damage potential if you accept that Temporal Revival can produce very different results between runs.
For Iris, Raging Blizzard slightly reduces the time needed to stack her buffs, but its long-term effect is small unless a skill misses. Positive Signal and Frozen Shield have too little uptime to prioritize.
For Freesia, combine Realm of Frost and Localized Snowfall with Winter’s Grip. Keep Guardian’s Heart behind her stronger options; its crit rate contribution has comparatively modest value.
Emblem Stats and Talent Investment
A Stella Sora Chitose build benefits most from Aqua PEN on both level 70 and level 80 emblems. The remaining priorities change with the emblem level, so evaluate each tier separately.
 Image: Steam / YOSTAR HONG KONG LIMITED
| Emblem level | Stat and potential priority |
|---|---|
| 70 | Aqua PEN → crit rate → auto attack damage → Aqua damage |
| 80 | Aqua PEN → auto attack level → crit rate → auto attack damage |
| 90 | Aqueous Phantasm levels → basic attack damage → Dance of Elegance levels → Aqua damage |
| 90, lower-priority alternatives | Tremble and Fall levels or Waltz of Ripples levels |
At level 90, Aqueous Phantasm levels deliver an estimated 16.97% damage increase in the evaluated setup. That makes them the strongest option listed for this emblem tier.
The other potential-level options contribute different bonuses:
- Dance of Elegance: 30% auto attack damage.
- Tremble and Fall: 23% auto attack damage.
- Waltz of Ripples: 19% attack.
These percentages describe different effects. Do not read a 30% auto attack bonus as a guaranteed 30% increase to total team damage. Its final contribution depends on the rest of the build.
How much do Chitose’s talents add?
Going from no talent investment to maximum talent investment provides up to approximately 87% more damage in the evaluated calculations. Disc choices and note and harmony skill outcomes can dilute that increase.
Talents 1 and 4 involve her ultimate. Because the ultimate’s long animation is unfavorable for single-target DPS, those talents offer limited value beyond their base stat gains in that situation.
Talent 1, combined with one or two ultimate potential cards, can bring the ultimate close to damage-neutral. That changes its practical role, but it still does not make repeated ultimate use the centerpiece of the auto attack build.
Prioritize the attack loop, Teresa’s major buff, and the recommended emblem stats when deciding where this setup gets its damage.
Chitose Combos, Buff Timing, and Ultimate Use
The Stella Sora Chitose rotation centers on reaching her sixth basic attack through dodge cancels. Tremble and Fall is what makes this loop a mandatory part of the recommended build.
Execute the attack loop
- Use Chitose’s skill for an animation cancel when it is off cooldown.
- Otherwise, dodge into the sixth basic attack.
- Let that attack connect.
- Cancel its remaining animation with another dodge.
- Repeat, using the skill again when available.
The timing distinction matters: cancel after the attack connects. Practice that transition until you can repeat it without losing track of the boss or your support effects.
Keep the skill involved in the loop. The recommendation is to prioritize it over a dodge for animation canceling whenever it is ready.
Place support skills around boss movement
Teresa’s and Iris’s skills are positioned on a static target. If a boss moves away immediately after you use them, you can lose substantial buff uptime.
Watch for an impending movement before committing those skills. Place them when the boss is positioned to remain within their effects, then maintain Chitose’s attack loop during that window.
This is especially important when comparing damage between runs. Check whether boss movement disrupted Teresa’s and Iris’s skill coverage before changing your potential priorities.
Use the ultimate when its timing makes sense
Avoid using Chitose’s ultimate routinely against a single target while your auto attack buffs are active. Its lengthy cast interrupts the stronger damage loop.
If you lose your support buffs, consider the ultimate when you have the relevant talents or one or two ultimate potential cards. That gap gives it a more reasonable place in the rotation.
Teresa’s ultimate does not cancel Tidal Domain. It does, however, make her leave the field earlier than expected, which can reduce certain buff uptimes. Account for that departure when managing the team’s support window.
FAQ
What is the best Stella Sora Chitose team?
Use Chitose with Teresa and either Iris or Freesia. Teresa’s Let Me Help is the key auto attack buff. Iris offers more consistent performance, while Freesia offers higher damage potential with chance-based buffs.
Which Chitose potentials should I prioritize?
Take Serpent’s Glide and Mirror Blade as cores, then acquire Tremble and Fall. Prioritize Aqueous Phantasm upgrades afterward, followed by Dance of Elegance and Azure Embrace.
What emblem stats does Chitose want?
Prioritize Aqua PEN at levels 70 and 80. At level 90, prioritize Aqueous Phantasm levels, followed by basic attack damage, Dance of Elegance levels, and Aqua damage.
Should Chitose use her ultimate against bosses?
Her ultimate ordinarily reduces single-target DPS because of its long cast. Talent 1 and ultimate potential cards can bring it close to damage-neutral. Consider using it during a lost-buff window with those investments.
Continue with
 Stella Sora Donna Guide: Builds, Teams, and EmblemsBuild Stella Sora Donna for Aqua teams with key potentials, Teresa and Chitose setups, emblem priorities, and Runic Disc picks. Time her skills for damage.
More in Characters

Stella Sora Allie Guide: Builds, Teams, and Skill Tips
Master Stella Sora Allie with Skill and Mark builds, all-Aqua teams, emblem priorities, talent tips, and Bedtime Story advice to guide your next upgrades.

Stella Sora Characters: Roster, Roles, and Team Guide
Explore Stella Sora characters, their elements, combat roles, Allie's builds, and Version 2.0 banners to plan your next team and recruitment priorities.
Stella Sora Eleanor Guide: Builds, Teams & Potentials
Master Stella Sora Eleanor with support and main builds, team options, Potential priorities, Emblem picks, and skill timing tips for her Ventus damage kit.

Stella Sora Firenze Guide: Builds, Teams, and Combos
Master Stella Sora Firenze with skill and minion builds, Umbra team picks, potential priorities, emblem stats, and burst combos that make her clones count.
Join the community
Official channels for news, updates and player help: