
Stella Sora Shia Build Guide: Discs, Teams, and Stats
Build Stella Sora Shia with practical disc picks, support teams, boss and mob setups, and emblem stat priorities to get more from her Lux auto attacks.
Jump to

Stella Sora Shia: What Her Build Needs
Shia brings orbiting rabbits and a screen-wide attack to the Lux DPS role. Building around those attacks gives you a clear direction for discs, supports, and emblem stats without making her signature disc a requirement. This Stella Sora Shia guide covers a practical budget setup and the differences between her boss and mobbing builds.
The core of a Stella Sora Shia build is auto-attack damage. Her two rabbits circle around her and deal auto-attack damage, while her large area attack scans the surrounding battlefield and strikes enemies inside it. That combination gives her distinct setups for concentrated boss damage and encounters packed with enemies.
| Build feature | Shia’s setup |
|---|---|
| Combat role | Main DPS |
| Attribute | Lux |
| Core damage mechanic | Two orbiting rabbits dealing auto-attack damage |
| Area coverage | A large attack that scans the area and hits enemies within it |
| Build directions | Boss-focused and mobbing-focused |
| Signature disc | Optional for a functional damage build |
Start by choosing the content you want to clear. For Boss Blitz, use her boss-focused potential setup. For Cataclysm Survivor, use the mobbing setup built around encounters with larger groups. Keep that distinction in mind before changing every piece of equipment after a disappointing run.
Her budget appeal comes from the equipment options available outside her signature disc. Summer Sanctuary, Sparkling Moment, and Glow all give you alternatives to consider. You can also build around Jinglin and Tilia for a free-to-play-oriented support lineup.
Put the damage engine together before chasing a premium setup. Match her potentials to the encounter, develop the discs you equip, and look for emblem stats that support her attacks.
Disc Choices: Build Without Her Signature
Shia’s signature disc is skippable for players putting together a practical damage build. Her alternatives include an event-shop disc, a purchase-shop option, and a four-star disc with a Lux damage effect.
 Image: Steam / YOSTAR HONG KONG LIMITED
That makes disc selection one of the more flexible parts of a Stella Sora Shia build. Choose from the options you can access, then invest in the equipment you actually intend to use.
| Disc | Acquisition detail | Relevant build detail |
|---|---|---|
| Summer Sanctuary | Event shop | An alternative to Shia’s signature disc |
| Sparkling Moment | Purchase shop | Another option for building Shia’s damage |
| Glow | Four-star option | Provides Radiant Omen, which increases Lux damage percentage |
| Shia’s signature disc | Signature option | Optional for the budget build |
Use the Shop Options
For Summer Sanctuary, open the event shop, purchase the disc when it is available, and equip it to Shia. For Sparkling Moment, check the purchase shop.
Choose Glow when you want to use its Radiant Omen effect to increase Lux damage. Its four-star rarity gives you another route to assembling the build without making the signature disc your starting requirement.
Avoid choosing equipment by rarity alone. Keep the actual effect in view: Glow has a specific connection to Shia’s Lux damage, while the other listed alternatives offer additional equipment choices. Compare those options within the setup you are building.
Develop Main and Support Discs
Bring both main discs and support discs to level 70 for the extra stats used in the developed setup. Support-disc levels belong on the same preparation checklist as the main equipment.
Before replacing a disc, inspect its level alongside the rest of the loadout. Compare builds with their equipment development in mind; otherwise, you risk attributing the difference entirely to disc choice.
For a budget account, the practical order is straightforward: equip an available alternative, develop the equipped discs, and evaluate the resulting setup before deciding whether to pursue Shia’s signature.
Support Teams and a Budget Starting Point
Jinglin and Tilia form the free-to-play-oriented support pairing for Shia. This lineup gives you a concrete team to build around while working on her discs, potentials, and emblem.
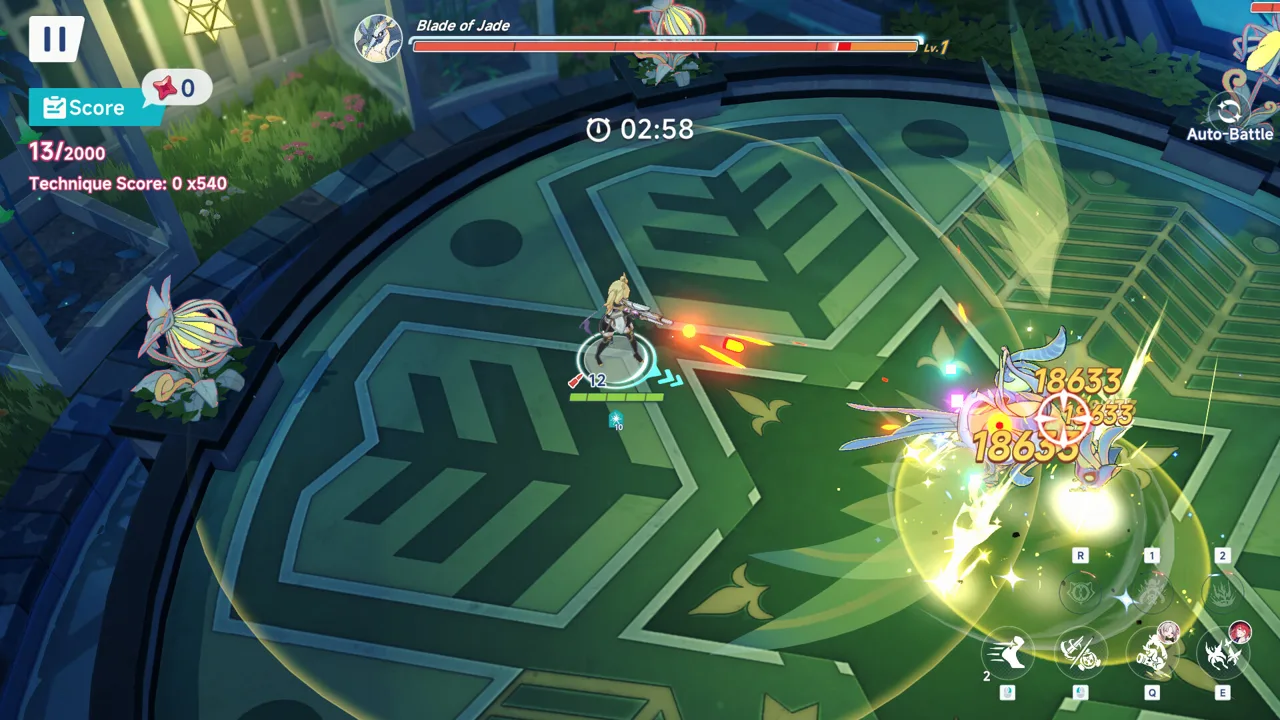 Image: Steam / YOSTAR HONG KONG LIMITED
Manova is also among Shia’s recommended support options. Keep that option in mind when assessing your roster, but use Jinglin and Tilia if you are following the budget configuration described here.
| Team component | Character or setup | Build detail |
|---|---|---|
| Main damage dealer | Shia | Lux DPS centered on auto attacks |
| Budget support pairing | Jinglin and Tilia | Used together in the free-to-play-oriented setup |
| Additional recommended support | Manova | An alternative support option for Shia |
| Support setup across modes | Jinglin and Tilia | Keeps the same core upgrades for boss and mobbing builds |
The useful detail is that Jinglin and Tilia keep the same core upgrades across both build directions. When moving between bossing and mobbing, focus your attention on Shia’s potential choices instead of rebuilding the entire party.
Keep the support configuration consistent when comparing her two setups. That gives you a more useful comparison of the changes you make to Shia herself. Change the encounter-focused part of the build deliberately, then review the result.
A low-investment setup can begin with Shia at affinity level five and no talents invested. Use that as a starting example, rather than a reason to leave those systems untouched indefinitely. The point is that you can assemble and evaluate her basic playstyle before completing every investment.
For your Stella Sora Shia team, check these items together:
- Equip Shia as the main DPS.
- Use Jinglin and Tilia for the budget support pairing.
- Develop the main and support discs.
- Keep the supports’ core upgrades consistent between build variants.
- Select Shia’s potentials for the content you are entering.
This gives you a defined starting configuration. From there, compare changes one at a time so that each adjustment has a clear purpose.
Boss Blitz and Cataclysm Survivor Builds
Shia has separate potential setups for boss encounters and mobbing. The boss build focuses on her boss-damage configuration, while the mobbing build changes her core potential selection for encounters with larger groups.

Both builds retain her auto-attack identity. The distinction is how you configure that kit for the enemies in front of you.
| Build element | Boss-focused setup | Mobbing-focused setup |
|---|---|---|
| Content example | Boss Blitz | Cataclysm Survivor |
| Potential selection | Boss-focused core potentials | Mobbing-focused core potentials |
| Silent Tide | Optional | Optional |
| Enhancement target | Follow the boss configuration | Aim for enhanced level six on the core effects |
| Budget supports | Jinglin and Tilia | Jinglin and Tilia |
| Disc foundation | Same equipment options | Same equipment options |
Boss Blitz: Keep the Benchmark in Perspective
A Shia setup without duplicates can reach 28,000 points in Boss Blitz. That gives players considering a budget build a useful performance example, but it is a benchmark to work toward rather than a score to expect immediately.
Compare the whole configuration before comparing scores. Disc levels, potentials, emblem rolls, talents, and affinity all belong in that comparison. A shared character lineup alone does not make two builds equivalent.
For your boss setup:
- Select the boss-focused potential configuration.
- Keep Jinglin and Tilia on their core support upgrades.
- Bring the main and support discs to level 70.
- Review emblem stats that support Shia’s damage.
- Use Silent Tide as an optional choice.
Keep the boss build focused on its intended encounter. Avoid carrying over the mobbing configuration simply because it performed well against a crowded battlefield.
Cataclysm Survivor: Configure for Groups
Use the mobbing setup for Cataclysm Survivor and encounters with many enemies. Shia’s large scanning attack provides area coverage alongside the damage from her orbiting rabbits.
Aim for enhanced level six on the mobbing build’s core effects. Silent Tide remains optional here, just as it is in the boss configuration.
Keep your established support pairing and disc foundation while adjusting her potentials. That lets you maintain a familiar team while changing the part of the build tied most directly to the encounter.
When evaluating Stella Sora Shia in these modes, judge each setup against its intended task. Compare boss performance with the boss configuration and group-clearing performance with the mobbing configuration.
Emblem Stats and Your Upgrade Checklist
Shia unlocks the emblem system at character level 70. Each emblem has four random stats, giving you another way to shape her damage after reaching that level.
The relevant targets include mark damage, crit rate, auto-attack damage, attribute damage percentage, and attack percentage. Use those categories when reviewing rolls rather than treating every offensive-looking emblem as interchangeable.
| Stat choice | Target options |
|---|---|
| Mark-related choice | Mark damage or crit rate |
| Auto-attack-related choice | Auto-attack damage or crit rate |
| Attribute choice | Attribute damage percentage |
| Attack choice | Attack percentage |
These choices give your Stella Sora Shia build a focused emblem checklist. Auto-attack damage connects directly to her rabbit attacks, while attribute damage supports her Lux damage direction. Crit rate, mark damage, and attack percentage round out the listed targets.
Inspect the complete set of rolls before deciding which emblem to use. Compare the combinations against the listed targets, and keep the rest of your equipment consistent while evaluating a change.
Prioritize a Complete Setup
Work through the build in this order:
- Choose the encounter: Boss Blitz or a mobbing-focused mode.
- Equip a disc alternative: Consider Summer Sanctuary, Sparkling Moment, or Glow.
- Develop equipped discs: Include both main and support discs.
- Set the party: Use Jinglin and Tilia for the budget lineup.
- Match potentials to content: Keep Silent Tide optional in either configuration.
- Review emblems at level 70: Look for the listed damage and crit options.
Use this checklist whenever your results fall short of your expectations. Inspect the equipment and potential configuration before making a new pull decision.
You can also check the Stella Sora official website for current event announcements while planning around event-shop equipment.
FAQ
What role does Stella Sora Shia fill?
Shia is a Lux main DPS whose core damage revolves around two orbiting rabbits dealing auto-attack damage. She also has a large scanning attack that hits enemies throughout its area, supporting a separate mobbing build.
Does Shia need her signature disc?
No. Summer Sanctuary, Sparkling Moment, and the four-star Glow are alternatives. Glow provides Radiant Omen, which increases Lux damage percentage. Build and develop an available option before deciding whether to pursue her signature disc.
Which supports can I use for a budget Shia team?
Use Jinglin and Tilia for the free-to-play-oriented pairing. Their core upgrades stay the same between Shia’s boss and mobbing configurations, so you can retain that support setup while adjusting her potentials.
When do Shia’s emblems unlock, and which stats should I target?
Emblems unlock at character level 70 and provide four random stats. Look for mark damage or crit rate, auto-attack damage or crit rate, attribute damage percentage, and attack percentage when reviewing your rolls.
Continue with
 Stella Sora Tier List: Best Trekkers and Team PrioritiesUse this Stella Sora tier list to compare top Trekkers, understand combat roles, and build stronger teams around Shia, Fuyuka, Nazuna, and key supports.
More in Characters

Stella Sora Allie Guide: Builds, Teams, and Skill Tips
Master Stella Sora Allie with Skill and Mark builds, all-Aqua teams, emblem priorities, talent tips, and Bedtime Story advice to guide your next upgrades.

Stella Sora Characters: Roster, Roles, and Team Guide
Explore Stella Sora characters, their elements, combat roles, Allie's builds, and Version 2.0 banners to plan your next team and recruitment priorities.

Stella Sora Chitose Guide: Builds, Teams, and Emblems
Build Stella Sora Chitose around auto attacks with the right potentials, Teresa support, and Aqua PEN emblems. Learn her combos and upgrade priorities now.
Stella Sora Donna Guide: Builds, Teams, and Emblems
Build Stella Sora Donna for Aqua teams with key potentials, Teresa and Chitose setups, emblem priorities, and Runic Disc picks. Time her skills for damage.
Join the community
Official channels for news, updates and player help: